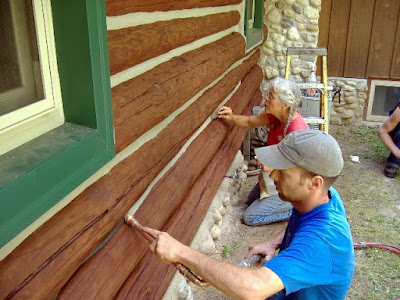
Well, I will probably take a break from this project for a couple of months to work on daughters tree-house.
But after that, it will be time to fill in the space between the logs.
This is called 'chinking' or 'chinking and daubing'.
I have always just called the whole process chinking, but I can't claim that to be official and lots of other reading suggests people like to have two names for the process, so we will go with 'Chinking' and 'Daubing'.
Back in the good old days, if a structure was just going to be used for animals the logs would either be left un-chinked or have boards over the openings. And unfortunately, if it were going to be a slave cabin, it may have only been boarded also.
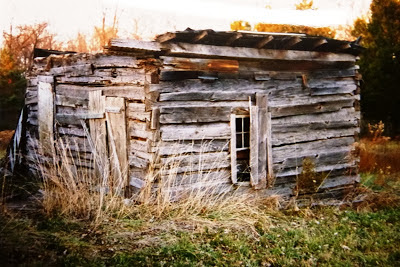
When I took down this old building which I call 'The Pitts Blacksmith Shop', which became the smaller cabin on my property, as you can see, it had the gaps just covered with boards.
This served the purpose of just keeping the wind out for the animals or, in this case, a working blacksmith.
Log buildings that would be used as a home in climates that had lots of cooler weather, had to do something more than just putting boards over the gaps.
'Chinking'
The most common method was to put some kind of solid filler between the logs first, such as wood or stone.
And then some kind of compound over this.
Usually a combination of clay, mud, straw or horse hair would cover the solids.
In this picture of the finished 'Pitts Blacksmith Shop' I left the solids between the logs exposed on the top two rows as a teachable moment.
The white over the solids is my 'chinking' method.
These next couple of photos show some of the ways solids have been put between the logs.
This cabin had pretty narrow gaps so just a few flat pieces of wood where needed.
If it had been a hewn log cabin, some of the 'chips' from the hewing would have been used.
In this one, the gaps are bigger and the pieces of wood had to be stacked like fallen dominoes.
If wedged tightly this can also help support the logs, which keeps the chinking tighter.
Some sources just call the solids between the logs the 'chinking'.
This is also a very good way of supporting the logs with the solids.
Small stones are wedged beneath each other, once again like fallen dominoes. (I prefer this method because I think my 'daubing' material holds better to stone.)
As you can see in this cropped image of the 'Pitts' building, that is what I did here.
I like it because the rough surfaces of the stones makes a good platform for the covering to attach to.
Now, on the main cabin, the two story, I braced between the logs with bricks and stones to support the span, but because I had such a large area to do I used 1/4 inch hardware cloth as 'chinking', nailed to the logs to support the 'duabing'. If you plan, when rebuilding, to put insulation between the logs, this is the best method. (And I will take photos of this next time I am at the cabin. This method also makes it easy to run wiring between logs, just don't cement right on the wiring.)
'Daubing' (the white stuff)
Now the next step is open to lots of debate.
Some sources call placing the covering layer on the solids 'daubing'. I still just refer to the whole process as 'chinking'.
But for this discussion lets go ahead and give it it's own name and call it daubing.
I have only ever used one kind of daubing, it was what I was taught.
And so far it has worked for me.
(In this image the 'daubing' has been patched or repaired many times. Probably because the logs get to much exposure to the weather.)
But there are lots of arguments over which kind of material is best for the 'chinking'.
The daubing I have always used is a Portland cement, lime and sand mixture. And if mixed right it is very easy to apply. 8 sand, 2 cement, one lime, unless you like it real white, then just add more lime. But make sure each batch is consistent.
I like a very white 'daubing' between the logs to make the gray of the logs stand out, but that is an individual choice. (You can also get a powdered dye if you want it to look more natural like clay or mud.)
Here on the main cabin you can see how the white stands out.
Draw backs with this method are; It is very hard to replace or fix.
If your foundation is not good, and the logs move a lot, it can crack or move away from the logs.
I have had neither of those problems with mine, as of yet, in 20 plus years.
Modern 'daubing' is made from a flexible synthetic material and is easy to apply and repair.
It seals very well, is flexible, and being flexible, keeps any drafts from coming between the logs.
I have never used it.
But. . . if I were building a log building to live in everyday, I would probably try this.
My biggest concern with this method would be whether or not it would hold moisture against the logs.
It would require some research on my part.
Like I said earlier, old 'daubing' would have been made out of clay, mud, with some sort of binder like straw, grass or horse hair.
In taking down several cabins I have come across some mud, straw, horse hair chinking.
But at $227.00 for five gallons and with an only ten year warranty, (and about $12,000 - $15,000 to daub the whole cabin) I think for the projects on my property, I am going to stick with what I know and hope it lasts for many more years.


No comments:
Post a Comment